Posted in Windows Powershell | 2 Comments | 5,384 views | 31/07/2011 23:17
Merhaba,
Bildiğiniz gibi 5651 gereği web, ftp ve mail loglarını şartnameye uygun olarak imzalamalı ve bu imzalı logları 6 ay boyunca saklamalısınız. Şartnamede logların nasıl imzalanacağıyla ilgili söyle bir şematik anlatım var.
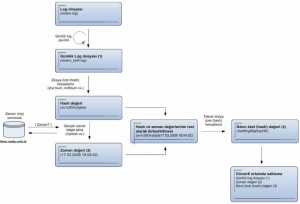
Yukardaki anlatımda da görebileceğiniz gibi aslında 3 farklı dosya saklamamız gerekiyor. Bunlar:
1. Log dosyası
2. Zaman damgası
3. Log hash’i ile zaman damgasının birleşik hash’i
Aşağıdaki Powershell scripti ile bu şartnameye uygun olarak hashleme yapabilirsiniz. Zaman sunucusu olarak script’te de tubitak kullanılmıştır.
1
2
3
4
5
6
7
8
9
10
11
12
13
14
15
16
17
18
19
20
21
22
23
24
25
26
27
28
29
30
31
32
33
34
35
36
37
38
39
40
41
42
43
44
45
46
47
48
49
50
51
52
53
54
55
56
| $Path = "D:\FTP\MailServerLogs"
$TargetFolder = Get-ChildItem "$Path" -Recurse
$CryptoServiceProvider = [System.Security.Cryptography.MD5CryptoServiceProvider];
$HashAlgorithm = New-Object $CryptoServiceProvider
foreach ($File in $TargetFolder)
{
$FileName = $File.Name
$FilePath = $File.DirectoryName
$SigName = $FileName + ".sign"
$SigPath = $FilePath + "\" + $SigName
$DateName = $FileName + ".date"
$DatePath = $FilePath + "\" + $DateName
if ((Test-Path $DatePath) -eq "True")
{
Write-Host "Date file is already exist."
}
else
{
$DateString = Get-Date -uformat "%d.%m.%Y"
$TimeString = (w32tm /stripchart /computer:time.ume.tubitak.gov.tr /samples:1)[-1].split("")[0]
$DateString = $DateString + " " + $TimeString
$DateFile = New-Item -Path "$FilePath" -Name $DateName -type "file" -value $DateString
}
if ((Test-Path $SigPath) -eq "True")
{
Write-Host "Hashtag is already exist."
}
else
{
$Fc = Get-Content $FilePath\$FileName
if ($Fc.Count -gt 0)
{
$Encoding = New-Object System.Text.ASCIIEncoding
$Bytes = $Encoding.GetBytes($Fc)
$HashByteArray = $HashAlgorithm.ComputeHash($Bytes)
$Hashstring = ""
foreach ($Byte in $HashByteArray) {$Hashstring += $Byte.tostring("x2")}
$SigFile = New-Item -Path "$FilePath" -Name $SigName -type "file" -value $Hashstring
Start-Sleep -m 500
}
}
$HashTag = Get-Content $FilePath\$SigName
$HashTag = $HashTag + $DateString
Remove-Item -Path $FilePath\$SigName
$Encoding = New-Object System.Text.ASCIIEncoding
$Bytes = $Encoding.GetBytes($HashTag)
$HashByteArray = $HashAlgorithm.ComputeHash($Bytes)
$Hashstring = ""
foreach ($Byte in $HashByteArray) {$Hashstring += $Byte.tostring("x2")}
$SigFile = New-Item -Path "$FilePath" -Name $SigName -type "file" -value $Hashstring
Write-Host "$FileName is signed!"
} |
$Path = "D:\FTP\MailServerLogs"
$TargetFolder = Get-ChildItem "$Path" -Recurse
$CryptoServiceProvider = [System.Security.Cryptography.MD5CryptoServiceProvider];
$HashAlgorithm = New-Object $CryptoServiceProvider
foreach ($File in $TargetFolder)
{
    $FileName = $File.Name
    $FilePath = $File.DirectoryName
    $SigName = $FileName + ".sign"
    $SigPath = $FilePath + "\" + $SigName
	$DateName = $FileName + ".date"
	$DatePath = $FilePath + "\" + $DateName

	if ((Test-Path $DatePath) -eq "True")
    {
        Write-Host "Date file is already exist."
    }
    else
	{
		$DateString = Get-Date -uformat "%d.%m.%Y"
		$TimeString = (w32tm /stripchart /computer:time.ume.tubitak.gov.tr /samples:1)[-1].split("")[0]
		$DateString = $DateString + " " + $TimeString
		$DateFile = New-Item -Path "$FilePath" -Name $DateName -type "file" -value $DateString
	}

	if ((Test-Path $SigPath) -eq "True")
    {
        Write-Host "Hashtag is already exist."
    }
    else
    {
        $Fc = Get-Content $FilePath\$FileName
        if ($Fc.Count -gt 0)
        {
            $Encoding = New-Object System.Text.ASCIIEncoding
            $Bytes = $Encoding.GetBytes($Fc)
            $HashByteArray = $HashAlgorithm.ComputeHash($Bytes)
            $Hashstring = ""
            foreach ($Byte in $HashByteArray) {$Hashstring += $Byte.tostring("x2")}
            $SigFile = New-Item -Path "$FilePath" -Name $SigName -type "file" -value $Hashstring
            Start-Sleep -m 500
        }
    }

	$HashTag = Get-Content $FilePath\$SigName
	$HashTag = $HashTag + $DateString
	Remove-Item -Path $FilePath\$SigName
	$Encoding = New-Object System.Text.ASCIIEncoding
    $Bytes = $Encoding.GetBytes($HashTag)
    $HashByteArray = $HashAlgorithm.ComputeHash($Bytes)
    $Hashstring = ""
    foreach ($Byte in $HashByteArray) {$Hashstring += $Byte.tostring("x2")}
    $SigFile = New-Item -Path "$FilePath" -Name $SigName -type "file" -value $Hashstring

	Write-Host "$FileName is signed!"
} Script’in path’ini değiştirmeniz ve bir cronjob olarak tanımlamanız yeterli olacaktır.

Posted in Linux Server, Virtual Machine Manager | No Comment | 4,415 views | 28/07/2011 01:04
Microsoft, Hyper-V için Linux Integration Services v3.1 yayınladı.
Özellikler:
- Sürücü desteği: Linux Integration Services, özellikle Hyper-V için geliştirilmiş Network, IDE ve SCSI depolama araçlarını destekler.
- Hyper-V için Fastpath Boot desteği: Artık Boot sürücüleri yüksek performans verebilmek için Virtualization Service Client (VSC) avantajından faydalanmaktadır.
- Timesync: Sanal sunucunun içerisindeki saat ile Hypervisor saati her zaman senkron kalmaktadır.
- Integrated Shutdown: Sanal sunucular, Hyper-V veya SCVMM üzerindeki “Shut Down” komutuyla kapatılabilmektedir.
- Symmetric Multi-Processing (SMP) desteği: Desteklenen Linux dağıtımları makina başı 4 sanal işlemci desteklemektedir. SMP desteği 32 bit işletim sistemlerinde bulunmamaktadır.
- Heartbeat: Hypervisor’un sanal sunucunun açık ve cevap verebilir durumda olup olmadığını kontrol edebilmesini sağlar.
- KVP (Key Value Pair) Exchange: Key Value Pair exchange özelliği sayesinde Linux sanal sunucu bilgileri ana host üzerinden okunabilmektedir.
Hala bulunmayan özellikler:
- Entegrasyon servisleri: Volume Snapshot Backup
- Networking: Jumbo Frames ve TCP Offload
- Storage: Hot Add/Remove (VHD’ler ve Passthrough Diskler)
Desteklenen işletim sistemleri:
- Red Hat Enterprise Linux 6.0 ve 6.1 x86 ve x64 (4 vCPU’ya kadar)
- CentOS 6.0 x86 ve x64 (4 vCPU’ya kadar)
Download:
Kurulum dökümanını dosyanın içerisinde bulabilirsiniz.

Posted in Linux Server, Virtual Machine Manager, Windows Powershell | No Comment | 3,862 views | 27/07/2011 13:59
Yeni Hyper-V Linux Integration Service v3.1 ile birlikte gelen KVP Exchange desteği sayesinde bir çok bilgiyi çekebilmeniz mümkün. Öncelikle yapmanız gereken Get-HyperVKVP dosyasını indirmek ve bir Hyper-V sunucusunun üzerine kurmak olacaktır.
Download:
Scripti Hyper-V sunucusu üzerinde aşağıdaki gibi çalıştırabilirsiniz.
.\Get-HyperVKVP.ps1 VMName |
.\Get-HyperVKVP.ps1 VMName Hyper-V üzerindeki CentOS 6 için örnek bir script çıktısı:
PS C:\> .\Get-HyperVKVP.ps1 Centos6
FullyQualifiedDomainName: centos6.yusufozturk.info
IntegrationServicesVersion: 3.1
NetworkAddressIPv4: 192.168.2.2
NetworkAddressIPv6: fe80::215:5dff
OSBuildNumber: 2.6.32-71.el6.x86_64
OSName: CentOS Linux release 6.0 (Final)
OSVersion: 2.6.32-71.el6.x86_64
ProcessorArchitecture: x86_64 Get-HyperVKVP.ps1 dosyasının kaynak kodu:
1
2
3
4
5
6
7
8
9
10
11
12
13
14
15
16
17
| $vm = $args[0]
filter Import-CimXml
{
$CimXml = [Xml]$_
$CimObj = New-Object -TypeName System.Object
foreach ($CimProperty in $CimXml.SelectNodes("/INSTANCE/PROPERTY"))
{
if ($CimProperty.Name -eq "Name" -or $CimProperty.Name -eq "Data")
{
$CimObj | Add-Member -MemberType NoteProperty -Name $CimProperty.NAME -Value $CimProperty.VALUE
}
}
$CimObj
}
$VmObj = Get-WmiObject -Namespace root\virtualization -Query "Select * From Msvm_ComputerSystem Where ElementName='$vm'"
$KvpObj = Get-WmiObject -Namespace root\virtualization -Query "Associators of {$VmObj} Where AssocClass=Msvm_SystemDevice ResultClass=Msvm_KvpExchangeComponent"
$KvpObj.GuestIntrinsicExchangeItems | Import-CimXml |
$vm = $args[0]
filter Import-CimXml
{
    $CimXml = [Xml]$_
    $CimObj = New-Object -TypeName System.Object
    foreach ($CimProperty in $CimXml.SelectNodes("/INSTANCE/PROPERTY"))
    {
		if ($CimProperty.Name -eq "Name" -or $CimProperty.Name -eq "Data")
		{
			$CimObj | Add-Member -MemberType NoteProperty -Name $CimProperty.NAME -Value $CimProperty.VALUE
		}
    }
    $CimObj
}
$VmObj = Get-WmiObject -Namespace root\virtualization -Query "Select * From Msvm_ComputerSystem Where ElementName='$vm'"
$KvpObj = Get-WmiObject -Namespace root\virtualization -Query "Associators of {$VmObj} Where AssocClass=Msvm_SystemDevice ResultClass=Msvm_KvpExchangeComponent"
$KvpObj.GuestIntrinsicExchangeItems | Import-CimXml Bilgileri WMI üzerinden çektiği için bu scripti SCVMM üzerinde kullanamazsınız.
Fakat SCVMM üzerinden Hyper-V’ye bir WMI bağlantısı açarak bu işlemi yapmanız da mümkün tabiki.

Posted in Linux Server, Virtual Machine Manager | 1 Comment | 9,215 views | 27/07/2011 13:28
Bu makalede size CentOS 6 üzerinde nasıl Hyper-V Linux Integration Services v3.1 kurabileceğinizi gösteceğim.
Adım 1: Hyper-V LIC v3.1 indirebilmek için aşağıdaki komutları uygulayın.
1
2
3
| cd /home
wget http://www.yusufozturk.info/linux/tools/LinuxICv31.tar
tar -xvf LinuxICv31.tar |
cd /home
wget http://www.yusufozturk.info/linux/tools/LinuxICv31.tar
tar -xvf LinuxICv31.tar 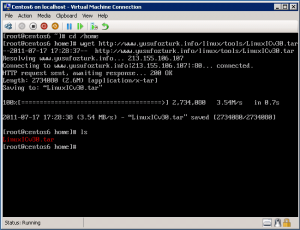
Adım 2: untar işlemi sonrası “LinuxICv31″ klasörüne gidin ve dosyaları kontrol edin.
1
2
3
| cd LinuxICv31
ls
cd x86_64 |
cd LinuxICv31
ls
cd x86_64 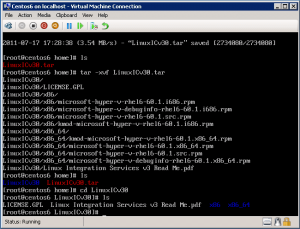
Adım 3: CentOS üzerinde “kmod-microsoft-hyper-v-rhel6-60.1.x86_64.rpm” kurulumunu yapın.
rpm -ivh kmod-microsoft-hyper-v-rhel6-60.1.x86_64.rpm |
rpm -ivh kmod-microsoft-hyper-v-rhel6-60.1.x86_64.rpm 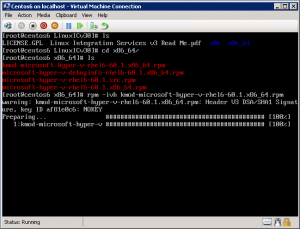
Adım 4: CentOS üzerinde “microsoft-hyper-v-rhel6-60.1.x86_64.rpm” kurulumunu yapın.
rpm –ivh microsoft-hyper-v-rhel6-60.1.x86_64.rpm |
rpm –ivh microsoft-hyper-v-rhel6-60.1.x86_64.rpm 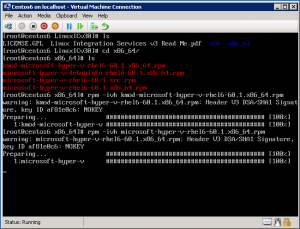
Adım 5: Eğer kurulum başarılıysa, aşağıdaki bilgi mesajını görmeniz gerekiyor.
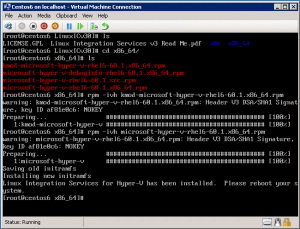
Adım 6: Sanal sunucunuzu kapatıp, emulated network adaptörünü kaldırın ve yerine sentetik network adaptörü ekleyin.
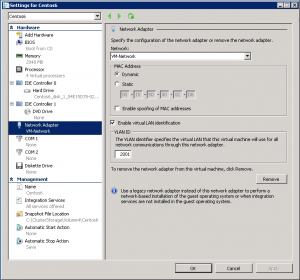
Adım 7: Eski MAC adresinin aynısını yeni network adaptörüne ekleyin ve statik olarak ayarlayın.
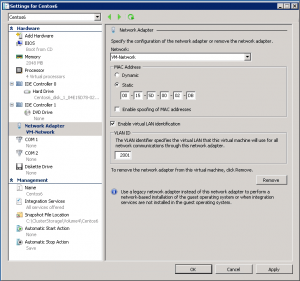
Adım 8: Sanal sunucunuzu başlatabilirsiniz.

Posted in Linux Server, Virtual Machine Manager | 15 Comments | 24,493 views | 27/07/2011 12:29
We finished CentOS installation on first part. I’ll show you how to install Hyper-V LIC and mouse support.
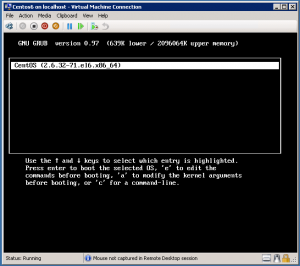
Step 19: After installation reboot server and using keyboard, stay at GRUB menu. Press “e” to edit.
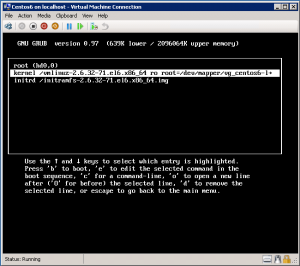
Step 20: Select kernel and press “e” again to edit kernel arguments.
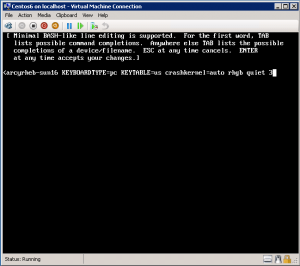
Step 21: Go to end and type “3″ to boot in multi user mode without graphical interface. Press “Enter” to save changes.
Step 22: Select kernel again and press “b” button to boot from that kernel.

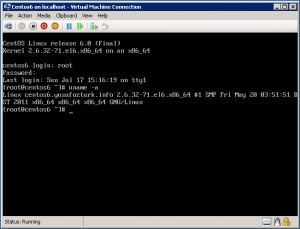
Step 23: Login with root username and password. Type “uname -a” to see your kernel.
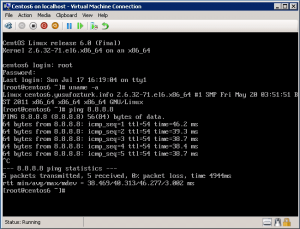
Step 24: Try to ping an ip address to check your network connection.
Step 25: Type the commands below to download integration components.
cd /home
wget http://www.yusufozturk.info/linux/tools/LinuxICv31.tar
tar -xvf LinuxICv31.tar |
cd /home
wget http://www.yusufozturk.info/linux/tools/LinuxICv31.tar
tar -xvf LinuxICv31.tar 
Step 26: After untar, go into “LinuxICv31″ directory and check files.
cd LinuxICv31
ls
cd x86_64 |
cd LinuxICv31
ls
cd x86_64 
Step 27: Install “kmod-microsoft-hyper-v-rhel6-60.1.x86_64.rpm” on CentOS.
rpm -ivh kmod-microsoft-hyper-v-rhel6-60.1.x86_64.rpm |
rpm -ivh kmod-microsoft-hyper-v-rhel6-60.1.x86_64.rpm 
Step 28: Install “microsoft-hyper-v-rhel6-60.1.x86_64.rpm” on CentOS.
rpm –ivh microsoft-hyper-v-rhel6-60.1.x86_64.rpm |
rpm –ivh microsoft-hyper-v-rhel6-60.1.x86_64.rpm 
Step 29: If installation is successful, then you should see this message.

Step 30: After LIC installation turn off your VM.
Step 31: Remove emulated network adapter. Add new synthetic network adapter.

Step 32: Set same MAC address but configure it as static.

Step 33: You can use CentOS 6 Desktop with mouse support.
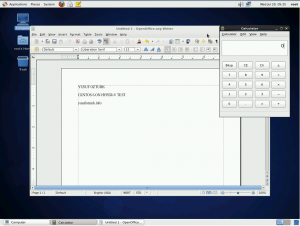
PS: Mouse support is only available with Hyper-V LIC v3.2 at the moment.

Posted in Linux Server, Virtual Machine Manager | 10 Comments | 17,308 views | 27/07/2011 10:18
Size bu makalede Hyper-V üzerinde adım adım nasıl CentOS 6 Desktop sürümünü kurabileceğinizi göstereceğim.
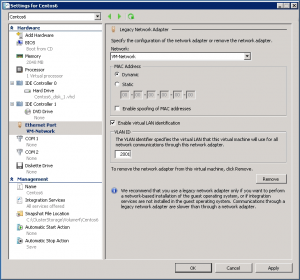
Adım 1: Hyper-V üzerinde emulated network adaptörü ve 1 vCPU ile bir VM yaratın.
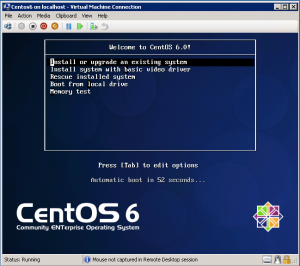
Adım 2: Grafiksel CentOS kurulumunu başlatabilmek için ilk seçeneği seçin.
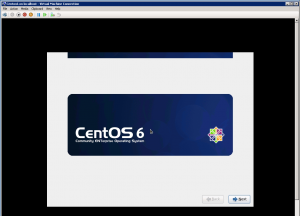
Adım 3: “Next” ile hoşgeldin sayfasını geçin.
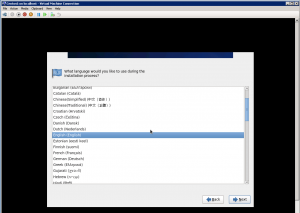
Adım 4: Kullanmak istediğiniz CentOS dilini seçin.
Adım 5: Klavye dilini seçin.
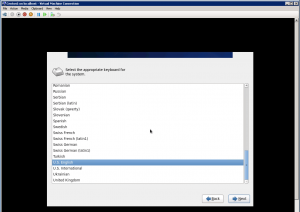
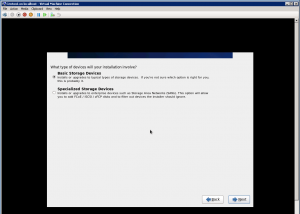
Adım 6: “Basic Storage Devices” seçeneğini seçin ve Next’e tıklayın.
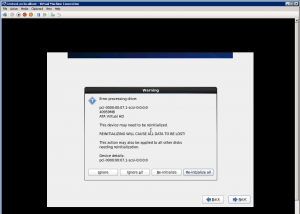
Adım 7: Partition re-initializing için onay verin.
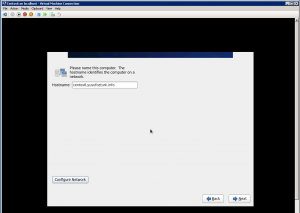
Adım 8: Bir hostname yazıp, adaptör üzerindeki IP adresini düzenleyebilmek için “Edit” butonuna basın.
Adım 9: Seçili network adaptörünü düzenlemek için tekrar “edit” butonuna basın.
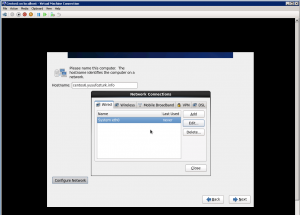
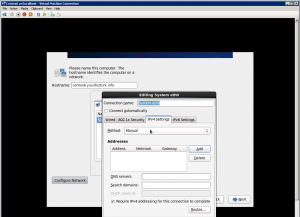
Adım 10: “IPv4 Settings” seçeneğine gidin ve method için “Manual” seçip “Add” butonuna tıklayın.
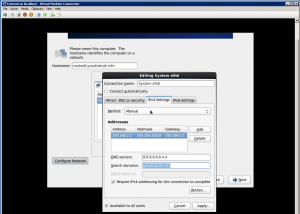
Adım 11: Network ayarlarını konfigure edin.
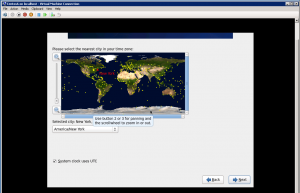
Adım 12: Bölgenizi seçin.
Adım 13: VM için bir parola belirleyin.
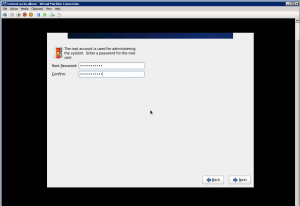
Adım 14: “Replace Existing Linux Systems” seçeneğini seçin ve “next” butonuna tıklayın.
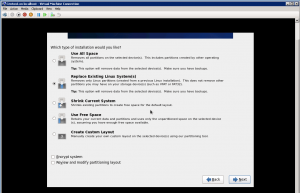
Adım 15: Değişiklikleri disk üzerine yazmayı onaylayın.
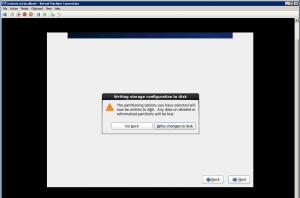
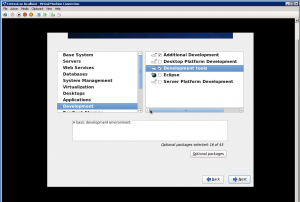
Adım 16: “Desktop” opsiyonunu seçip, “Customize now” seçeneğini seçin.
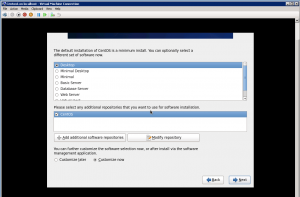
Adım 17: Yüklenmesi için “Additional development” ve “Development Tools” bileşenlerini seçin.
Adım 18: Eğer bu ekranı görüyorsanız, kurulumu tamamladınız demektir.
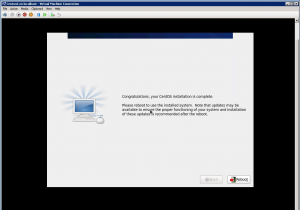
Part 2 üzerinden kuruluma devam edebilirsiniz.
Not available yet!

Posted in Exchange Server, Windows Powershell | No Comment | 8,210 views | 26/07/2011 23:14
If you have an MTA, you have to configure Send-Connector to use that MTA as a smarthost. If that MTA is yours, then you can set relay on that server for your Exchange servers. But what about 3rd party MTA providers like DynDNS? They give you username/password for Basic Authentication and you can’t send email without that credentials. So we also need to set Basic Authentication on Send-Connector but how? Because Hosted Exchange 2010 SP1 has no GUI and Powershell requires System.Management.Automation.PSCredential to accept your credentials. I’ll show you how to solve this.
1
2
3
| $SecurePassword = ConvertTo-SecureString "PASSWORD_HERE" -AsPlainText -Force
$Credentials = new-object -typename System.Management.Automation.PSCredential -argumentlist "USERNAME_HERE", $SecurePassword
Get-SendConnector "SEND_CONNECTOR_HERE" | Set-SendConnector -DNSRoutingEnabled $false -SmartHosts 'SMARTHOST_HERE' -SmartHostAuthMechanism 'BasicAuth' -UseExternalDNSServersEnabled $false -AuthenticationCredential $Credentials |
$SecurePassword = ConvertTo-SecureString "PASSWORD_HERE" -AsPlainText -Force
$Credentials = new-object -typename System.Management.Automation.PSCredential -argumentlist "USERNAME_HERE", $SecurePassword
Get-SendConnector "SEND_CONNECTOR_HERE" | Set-SendConnector -DNSRoutingEnabled $false -SmartHosts 'SMARTHOST_HERE' -SmartHostAuthMechanism 'BasicAuth' -UseExternalDNSServersEnabled $false -AuthenticationCredential $Credentials For example you have an MTA service from DynDNS and your information:
Host: smtp.dyndns.org
Username: yusufozturk
Password: password
Default Send Connector: Internet Connector
So you should use this script for that informations:
1
2
3
| $SecurePassword = ConvertTo-SecureString "password" -AsPlainText -Force
$Credentials = new-object -typename System.Management.Automation.PSCredential -argumentlist "yusufozturk", $SecurePassword
Get-SendConnector "Internet Connector" | Set-SendConnector -DNSRoutingEnabled $false -SmartHosts 'smtp.dyndns.org' -SmartHostAuthMechanism 'BasicAuth' -UseExternalDNSServersEnabled $false -AuthenticationCredential $Credentials |
$SecurePassword = ConvertTo-SecureString "password" -AsPlainText -Force
$Credentials = new-object -typename System.Management.Automation.PSCredential -argumentlist "yusufozturk", $SecurePassword
Get-SendConnector "Internet Connector" | Set-SendConnector -DNSRoutingEnabled $false -SmartHosts 'smtp.dyndns.org' -SmartHostAuthMechanism 'BasicAuth' -UseExternalDNSServersEnabled $false -AuthenticationCredential $Credentials After this changes, you will be able to use your MTA.
|


