home
home
 projects
 about
about
 contact
 follow
 feed
feed
 settings

Categories
Sponsors

Archive
 Blogroll
Badges

Community

|
Posted in Windows Powershell | No Comment | 2,302 views | 27/05/2012 23:05
Yakın zaman içinde PoSH Server diye bir ürün çıkardım. PoSH Server kısaca Powershell üzerinde çalışan 30 KB’lık bir web server. Şuan için HTML, PHP ve Powershell içeriklerini http üzerinden sunabiliyor. PoSH Server, IIS’in kurulamadığı ya da daha portatif bir çözüm ile yayın yapmak istenilen sunucular için ideal bir üründür. Kısaca PoSH Server özelliklerini maddeleyecek olursak: 1. Kimlik Doğrulama: Basic ve Windows Authentication kullanarak içeriklerinizi güvenlik altına alabilirsiniz.
2. IP Kısıtlama: HTTP yayınının bazı networkler üzerinden erişimini engelleyebilir ya da sadece belli ip adreslerinin erişimine açabilirsiniz. 3. İçerik Filtreleme: Bazı içeriklerin web sunucusu üzerinden görüntülenmesini veya indirilmesini engelleyebilirsiniz. 4. Gelişmiş Loglama: IIS standartlarında loglama sayesinde web sitenize gelen tüm istekler loglanmaktadır. 5. Log Parser: PoSH Server ile birlikte gelen ufak Log Parser sayesinde web loglarınızı görüntüleyebilirsiniz. 6. PHP desteği: WebPI üzerinden de kurabileceğiniz PHP 5.3 ve PHP 5.4’ü kullanarak, PoSH Server üzerinden PHP script çalıştırabilirsiniz. 7. Arkaplanda çalışma: Sunucunuzu restart etseniz bile PoSH Server restart sonrası çalışmaya devam edecektir. PoSH Server, tüm bu özelliklerinin yanında; ufak boyutu, kolay kurulabilir olması ve açık kaynak kodlu olması sayesinde bir çok sistem yöneticisinin ilgisini çekebilecek bir üründür. Ayrıca Rest desteği sayesinde Powershell scriptlerinizi sunucunuzu yönetecek şekilde PoSH Server üzerinde kullanabilir ve işlem sonuçlarını XML olarak bastırabilirsiniz. Kısa bir süre önce çıkmış olan SetLinuxVM Web Access de PoSH Server kullanarak hizmet vermektedir. PoSH Server’ın web sitesine aşağıdaki adresten ulaşabilirsiniz. Yine kurulum ve kullanımla ilgili sıkça sorulan soruları web sitesinde görebilirsiniz.
Posted in Windows Powershell | No Comment | 2,770 views | 22/05/2012 01:50
Well, new version of PoSH Server now supports PHP and running as a background job. But how did I do this? I’ve used scheduled jobs to start PoSH Server on every restart. Let’s see my code. First I identify Task ID and Job Values:
Then I create scheduled job with these arguments:
Finally, I run Scheduled Job:
You can download PoSH Server v1.6 to check rest of the codes.
Posted in Windows Server | No Comment | 5,597 views | 10/05/2012 10:29
If you have multiple ip addresses on your Windows Server, Windows always use nearest ip adress to gateway. So if you need to change it, you should remove all ip addresses and add it via Netsh.
Skipassource means Windows won’t use this ip address for outgoing communication unless explicitly set for use by outgoing packets.
Posted in Windows Powershell | No Comment | 2,240 views | 04/05/2012 01:35
If you need to create GUID on Powershell, just you can type:
This command will give you something like this: 5f43a2ed-1dca-47d8-a0b8-18c7f0dbf03c
That’s all!
Posted in Virtual Machine Manager, Windows Powershell | 7 Comments | 7,163 views | 04/05/2012 01:02
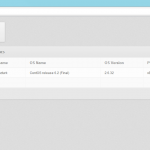
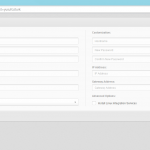
I’m very proud to announce you the new version of SetLinuxVM! Today, SetLinuxVM is 1 year old! After number of bug fixes, improvements and new functionalities, Set-LinuxVM reached to version 4.0 stable. Fixed bugs: New functionalities: General functionalities: Screenshots: Copyright (C) 2012 Yusuf Ozturk
This program is free software; you can redistribute it and/or modify it under the terms of the GNU General Public License as published by the Free Software Foundation; either version 2 of the License, or (at your option) any later version. This program is distributed in the hope that it will be useful, but WITHOUT ANY WARRANTY; without even the implied warranty of MERCHANTABILITY or FITNESS FOR A PARTICULAR PURPOSE. See the GNU General Public License for more details. You should have received a copy of the GNU General Public License along with this program; if not, write to the Free Software Foundation, Inc., 59 Temple Place, Suite 330, Boston, MA 02111-1307 USA Download: Donate: Thanks to support this open source project! Usage: 1. First, you should allow signed Powershell scripts:
2. Extract file and move “SetLinuxVM” directory under to “C:\Windows\System32\WindowsPowerShell\v1.0\Modules”. 3. Import as a module:
4. That’s it. To see how to use it:
5. Follow to instructions. How to start SetLinuxVM Web Access? 1. Just go to Powershell and type:
You can search in my blog for how to create Linux VM templates! |